
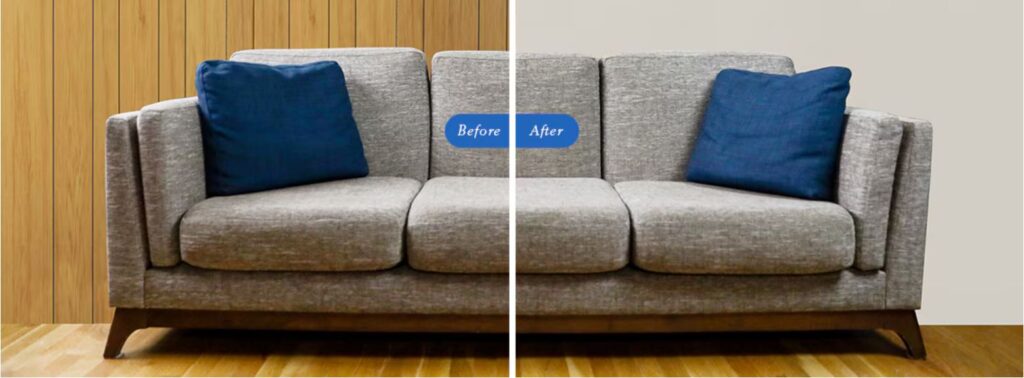
Whether you have high-quality varnished hardwood, simple veneer, or faux paneling, you can paint over wood paneling to give it a fresh new look.
A Guide to Painting Wood Paneling
By painting over wall paneling, you avoid the hassle of dealing with problems affecting the wall surface beneath the paneling. The key to success is putting in a little extra time on the front end to prep the surface properly.
Step 1: Assess the Wood Paneling
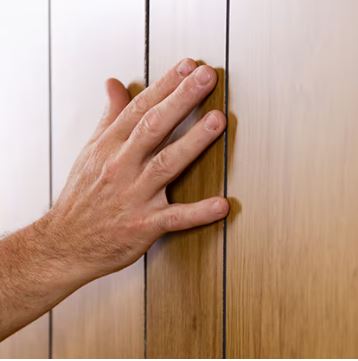
Before you start, take the time to determine what type of paneling you have. Polyurethane finish, layers of paint, or even decades of cleaning product buildup can mask the material underneath.
To figure out what you’re working with, find an exposed edge of a panel. This may require removing an HVAC grate or a piece of baseboard molding.
If your paneling is veneer (which has only a thin surface layer of wood grain), fiberboard, or composite instead of solid wood, be very careful not to damage it. If you are painting over wood paneling, you can proceed with cleaning.
Step 2: Clean the Wood Paneling
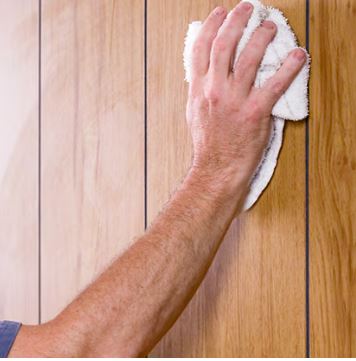
Grease, grime, and even residue from cleaning products can really build up on veneer or hardwood paneling over the years and prevent your paint from fully adhering to the surface.
Be sure to remove all contaminants and residue with a degreasing cleaner before beginning work. If the paneling is still too glossy after cleaning, you may need to dull the surface a bit with a light sanding to make sure the paint has texture it can adhere to.
Take extra care if you’re dealing with veneer. Sanding can ruin the thin outer layer, exposing the fiberboard underneath.
Step 3: Spot Prime Your Wood Paneling
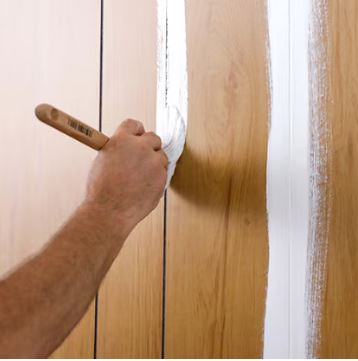
Consider your desired result: Do you want a smooth wall, or would you like to keep the grooved look of paneling? If you want to keep the grooves, skip to Step 4.
If you want your painted paneling to have a smooth surface, check out the video on this page. You’ll need to prime the paneling first—at least the areas you plan to fill with spackling compound or caulk—to ensure you get the best possible adhesion. Primer options for wood paneling include the following:
- For laminate or veneer paneling, Insl-X® Stix® Primer, specifically engineered to bond with challenging glossy surfaces, will give you the best results.
- For hardwood paneling, Insl-X Aqua Lock® Plus or Fresh Start® High-Hiding Primer will provide better stain blocking for real wood, with very good adhesion.
- For a tannin-rich wood like cedar or redwood, your best option is an oil-based primer such as Insl-X Prime Lock Plus or Fresh Start All-Purpose Primer.
Step 4: Spackle and Caulk the Paneling
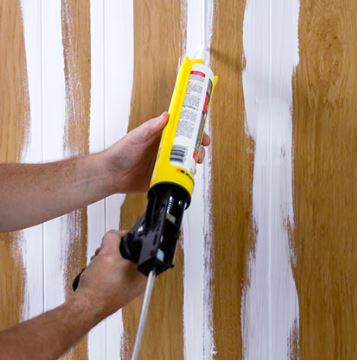
To get the best adhesion, wait until the first coat of primer has dried before spackling the paneling. If you’re going for a smooth look, use joint compound (also called drywall mud) or spackling compound to fill all the grooves in the paneling to meet the rest of the surface. Using a quick-drying “hot mud” or patch, which has a high pH level, creates unique challenges and is not recommended. If you do use it, be sure to use a 100% acrylic primer for best results.
Whether you’re going for a smooth or grooved look, fill in any seams between panels. For this, you should use caulk instead of spackling compound. Caulk will expand as the panels shift slightly over time, whereas spackling compound may crack.
Step 5: Sand, Vacuum, and Tack for Smooth Paneling
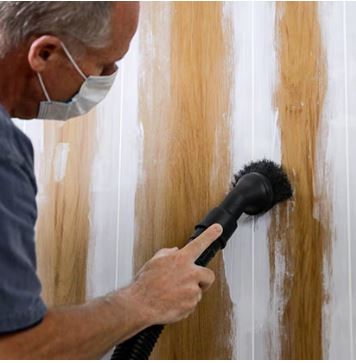
A light sanding before painting wood paneling will create a smooth, dull surface that is free of imperfections and just rough enough to give the paint proper adhesion.
Using a fine sandpaper (220 grit is a good level here), focus on smoothing out any uneven areas or dried drips. After sanding, be sure to vacuum the paneling thoroughly and then tack or wipe everything down with a damp cloth to remove any remaining dust. Let it dry.
Step 6: Prime Your Wood Paneling Again
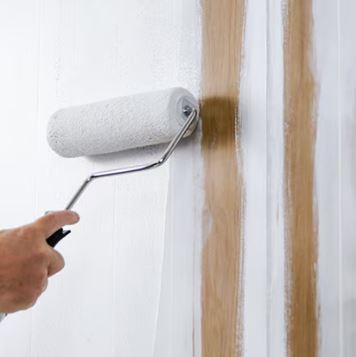
Re-priming after spackling and caulking is one of the most important things you can do to ensure an even, professional-looking finish. A second coat of primer helps to conceal the differences between the spackling compound and the panel surfaces, cover stains or knots in the paneling, and provide proper adhesion for your paint top coat. Let the primer fully dry as recommended on the label.
Step 7: Paint the Wood Paneling
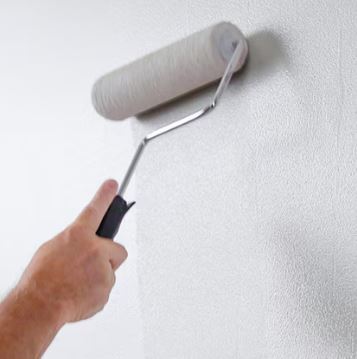
Use a paintbrush to cut in to corners and edges first, then blend the seams as you coat the rest of the wall with a roller. Note that a lighter paint color on dark wood may require an extra coat, depending on how well the primer masked the wood grain.
Step 8: Apply a Second Coat to Your Painted Paneling
When the first coat of paint is fully dry, apply a second coat for an even, spot-free finish. Be sure to allow 24 hours for the new finish to fully cure before placing any wall décor, fixtures, or furniture.
Different Paints Offer a Range of Finish Options for Paneling
Waterborne alkyds like Benjamin Moore Advance® offer an easy-to-apply top coat for painting paneling and cure to a durable, furniture-quality finish. Latex paints will give you more of a glossy or shiny look: Aura® Interior and Regal® Select Interior both offer rich, durable color and provide a mildew-resistant finish.
Benjamin Moore offers 3,500+ different colors from which to choose, and our 8 oz. paint color samples are available for shipping right to your door to make decision-making easier.
Enjoy the Look of Your Freshly Painted Wood Paneling
Few projects have as much impact on the look of a room as painting old paneling. By taking the time to do the proper prep work, you can transform a dated room into a space that is fresh and beautiful.